Brass Debut: From Rough Cuts to Razor-Sharp Teeth 🥇🛠️
Just turned some brass into golden curls with a 0.4mm carbide ball-nose, and my workshop didn't explode! 🎉 Each spin felt like a toss-up between victory and chaos, but hey, no emergency stops this time! Check out the gleaming results if you're into tiny gears and big wins: https://thebitcoinwatchmaker.com/post/view/brass-debut-from-rough-cuts-to-razor-sharp-teeth/ 👀✨
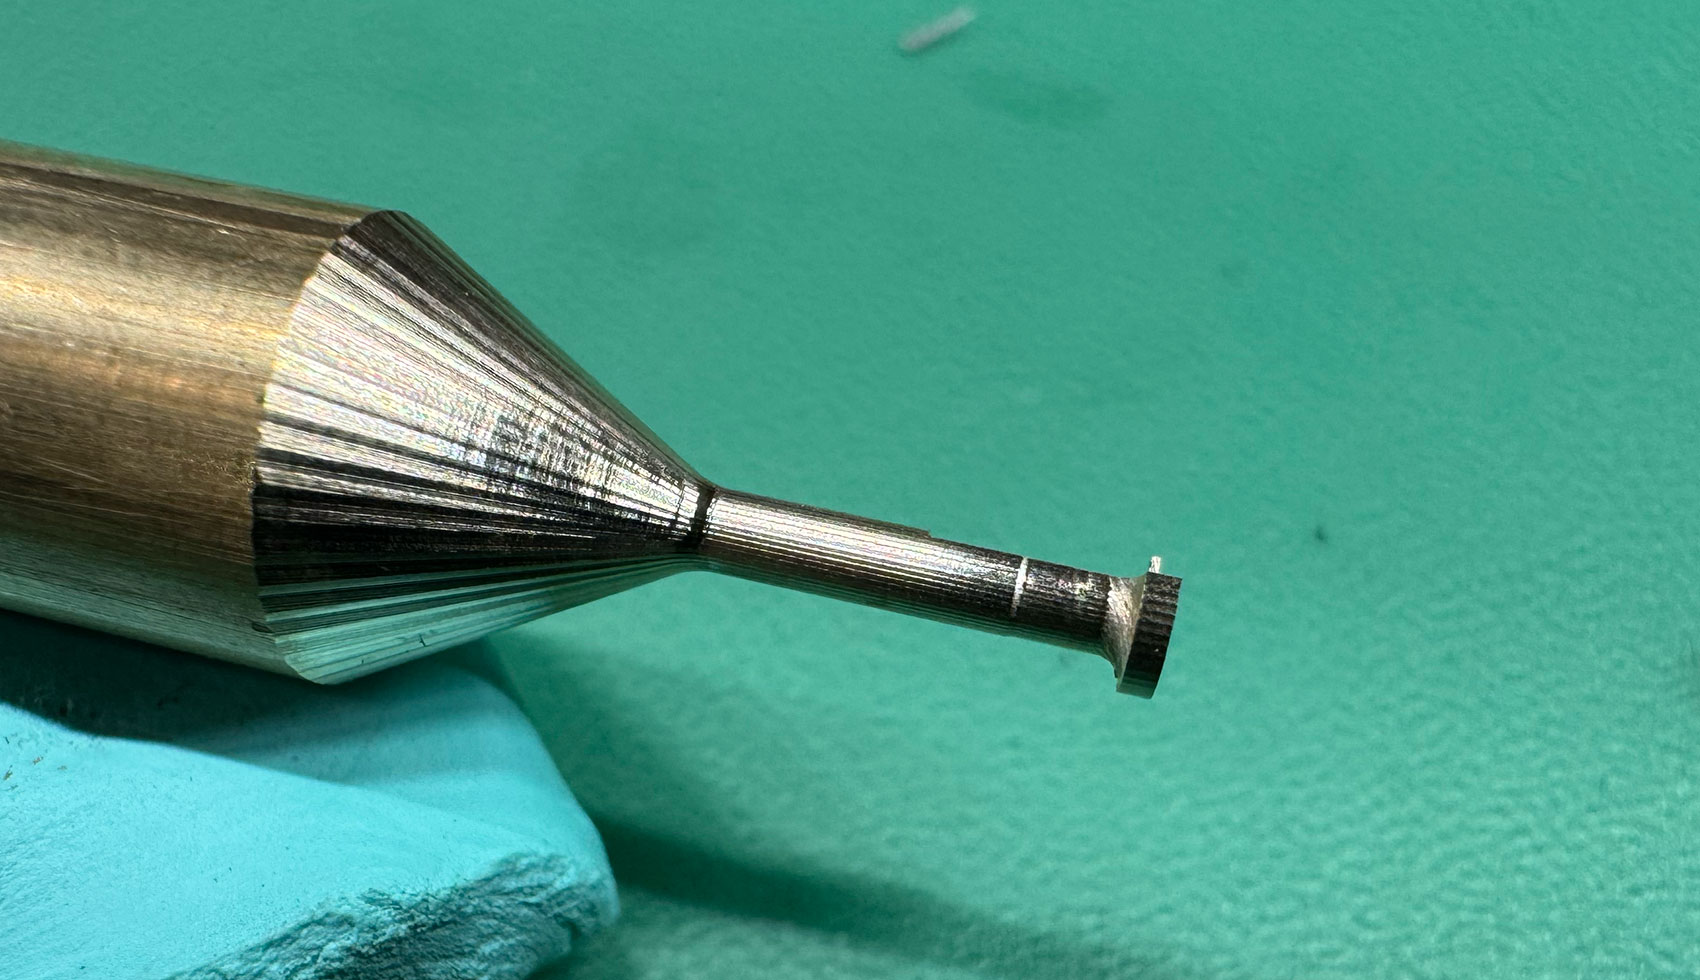
First day turning pixels into golden curls! I sent a 0.4 mm carbide ball-nose through brass using a four-step plan (well, three plus a skip) and the chips did not disappoint.
What a week—literally. I built this entire setup in seven caffeine-soaked days, hit run, and hoped the cutter wouldn’t find a new way to redecorate my vise. Every spin of the spindle felt like a coin toss between triumph and catastrophic crash. Roller-coaster, meet workshop. 🎢
But the gamble paid off. I sent a 0.4 mm carbide ball-nose through brass using a four-step plan (well, three plus a skip) and the chips did not disappoint:
- Pass 0 – Rough shape: big step-overs, big chips.
- Pass 1 – Finer rough: tighter outline, heat still low.
- Pass 2 – Relief angle: light plunge to free the flanks before final form.
- Pass 3 – Skipped: brass ≠ tool—edge saved for the good stuff.
- Pass 4 – Gear-tooth detail: feather cuts that leave razor-sharp teeth (rapid plunge mellowed just enough!).
The result? Mirror-bright flanks, zero burrs, and—most importantly—no emergency e-stop drama. Still buzzing from the adrenaline.
Love watch-scale machining? Smash that like, drop your questions, and subscribe so you don’t miss the A-axis run-out test.