
Lathe Ready to Roll! 🎉
Spent weeks wrestling with my lathe, but it's finally ready to roll! 🛠️ Had to remake the backplate three times because of those pesky vibrations and noise. Manufacturer woes? You bet. But the rebuild was a blessing in disguise — now I know this machine inside out! 🙌 Super excited for the next steps in this watchmaking journey. Let’s make some tiny mechanical art! 🌀✨ Check out the full saga at thebitcoinwatchmaker.com.
After weeks of learning, mistakes, and exciting breakthroughs — the lathe is finally good to go! 🛠️
I had to remake the backplate three times due to different layouts. The lathe's travel is limited, so I had to get creative. But now it’s dialed in and solid.
⚠️ Manufacturer Woes (Mucho NO recommendo)
To be honest — the manufacturer did a terrible job on this lathe. It came with:
- Insane vibrations
- Super loud noise during operation
- Broken and unconfigurable software
- Default tool change macro that literally caused a collision 😤
That mess sent me down the rabbit hole of rewiring, reprogramming, and rebuilding much of the system from scratch. Painful… but I now know the machine inside out!
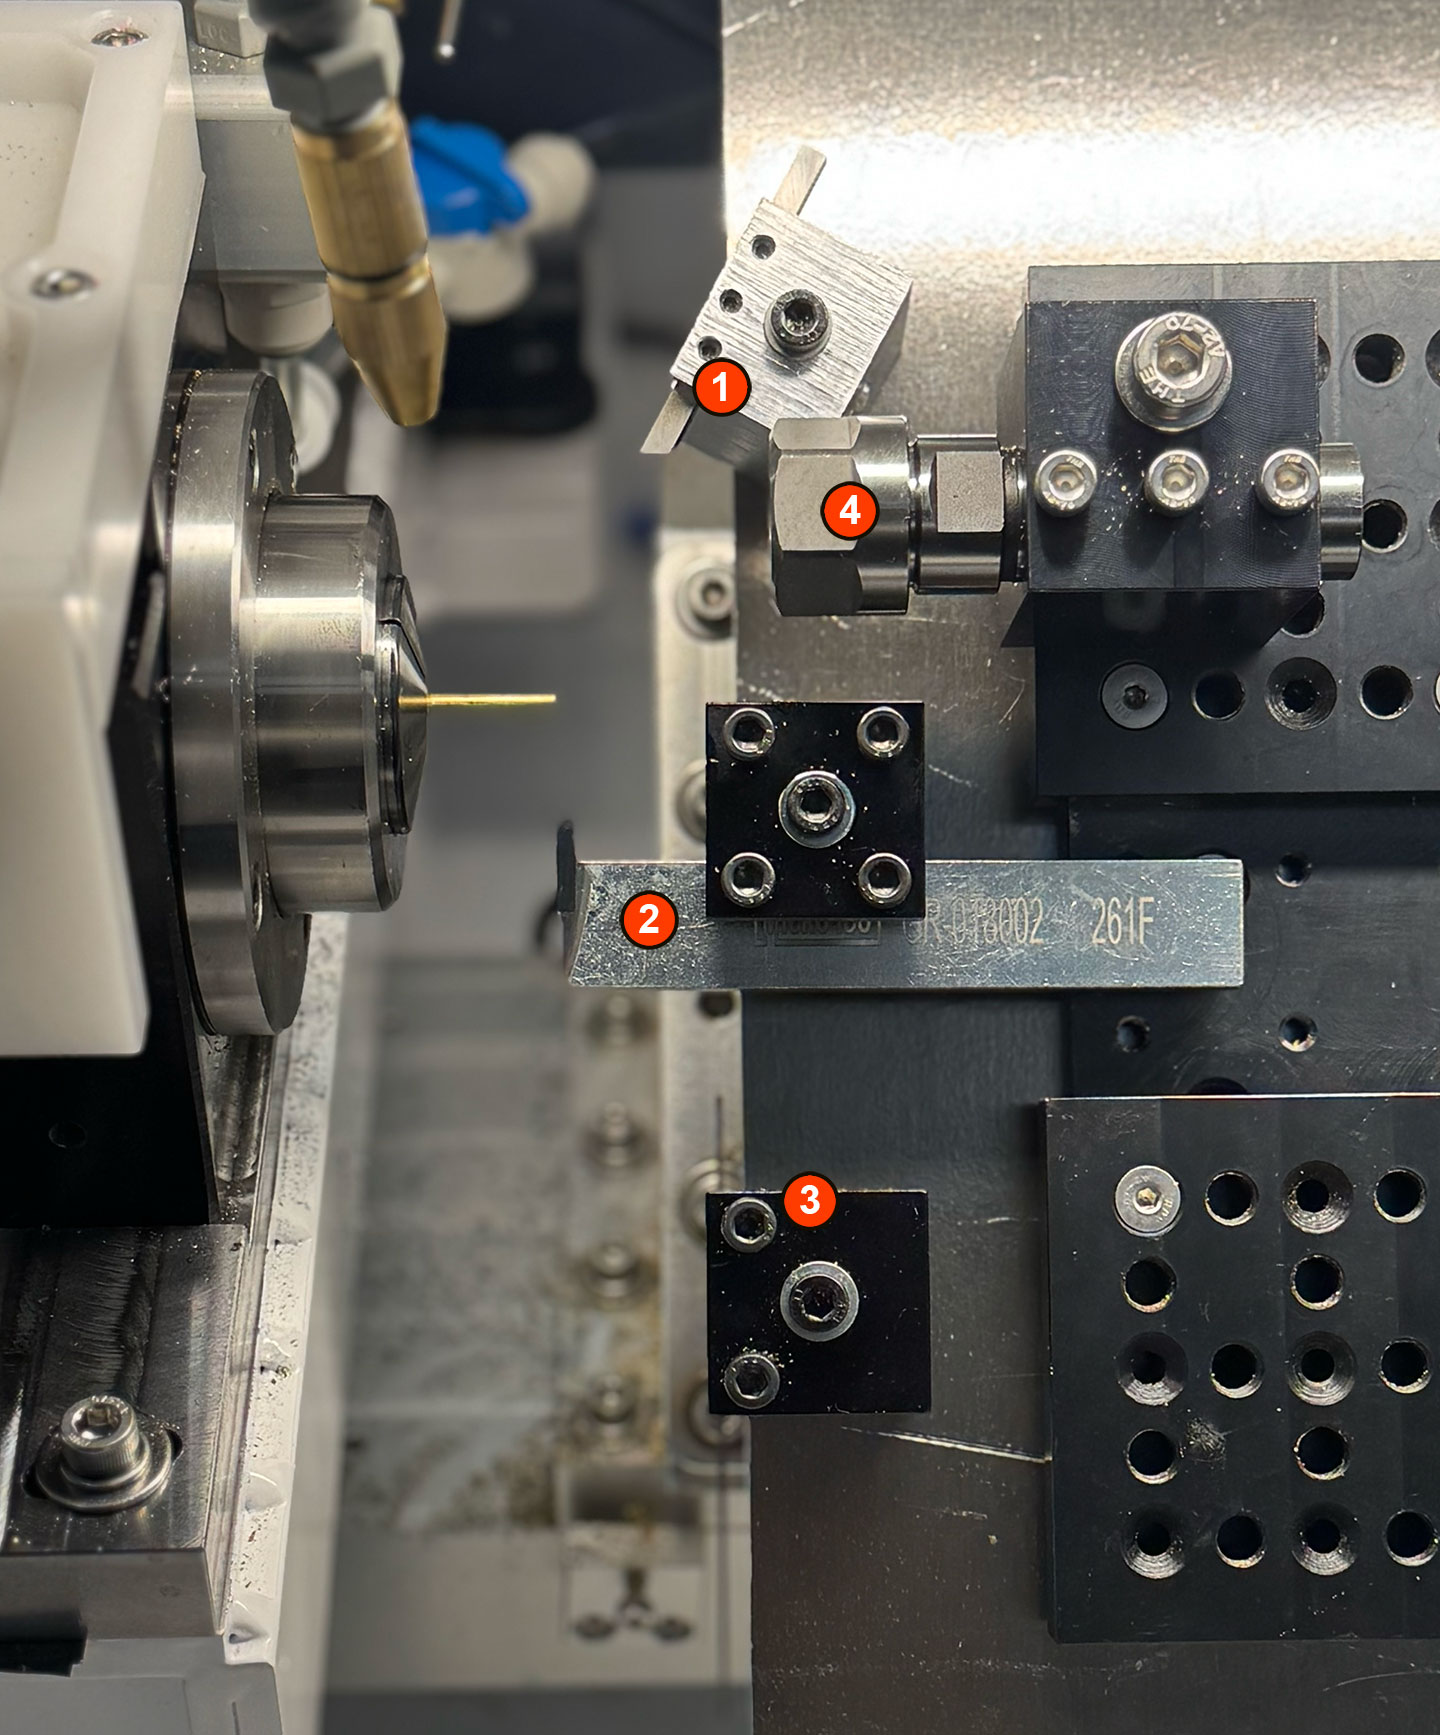
🔩 Current Tool Setup (4 Tools)
- HSS Cutting Tool — hand-ground by me at a 45° angle. My first toolmaking experiment!
- Micro 100 Grooving Tool — fantastic for tight grooves and channeling.
- Cutout Tool — great for partying shapes with high precision.
- Drill Fixture — holds fixed drills securely for consistent center holes.
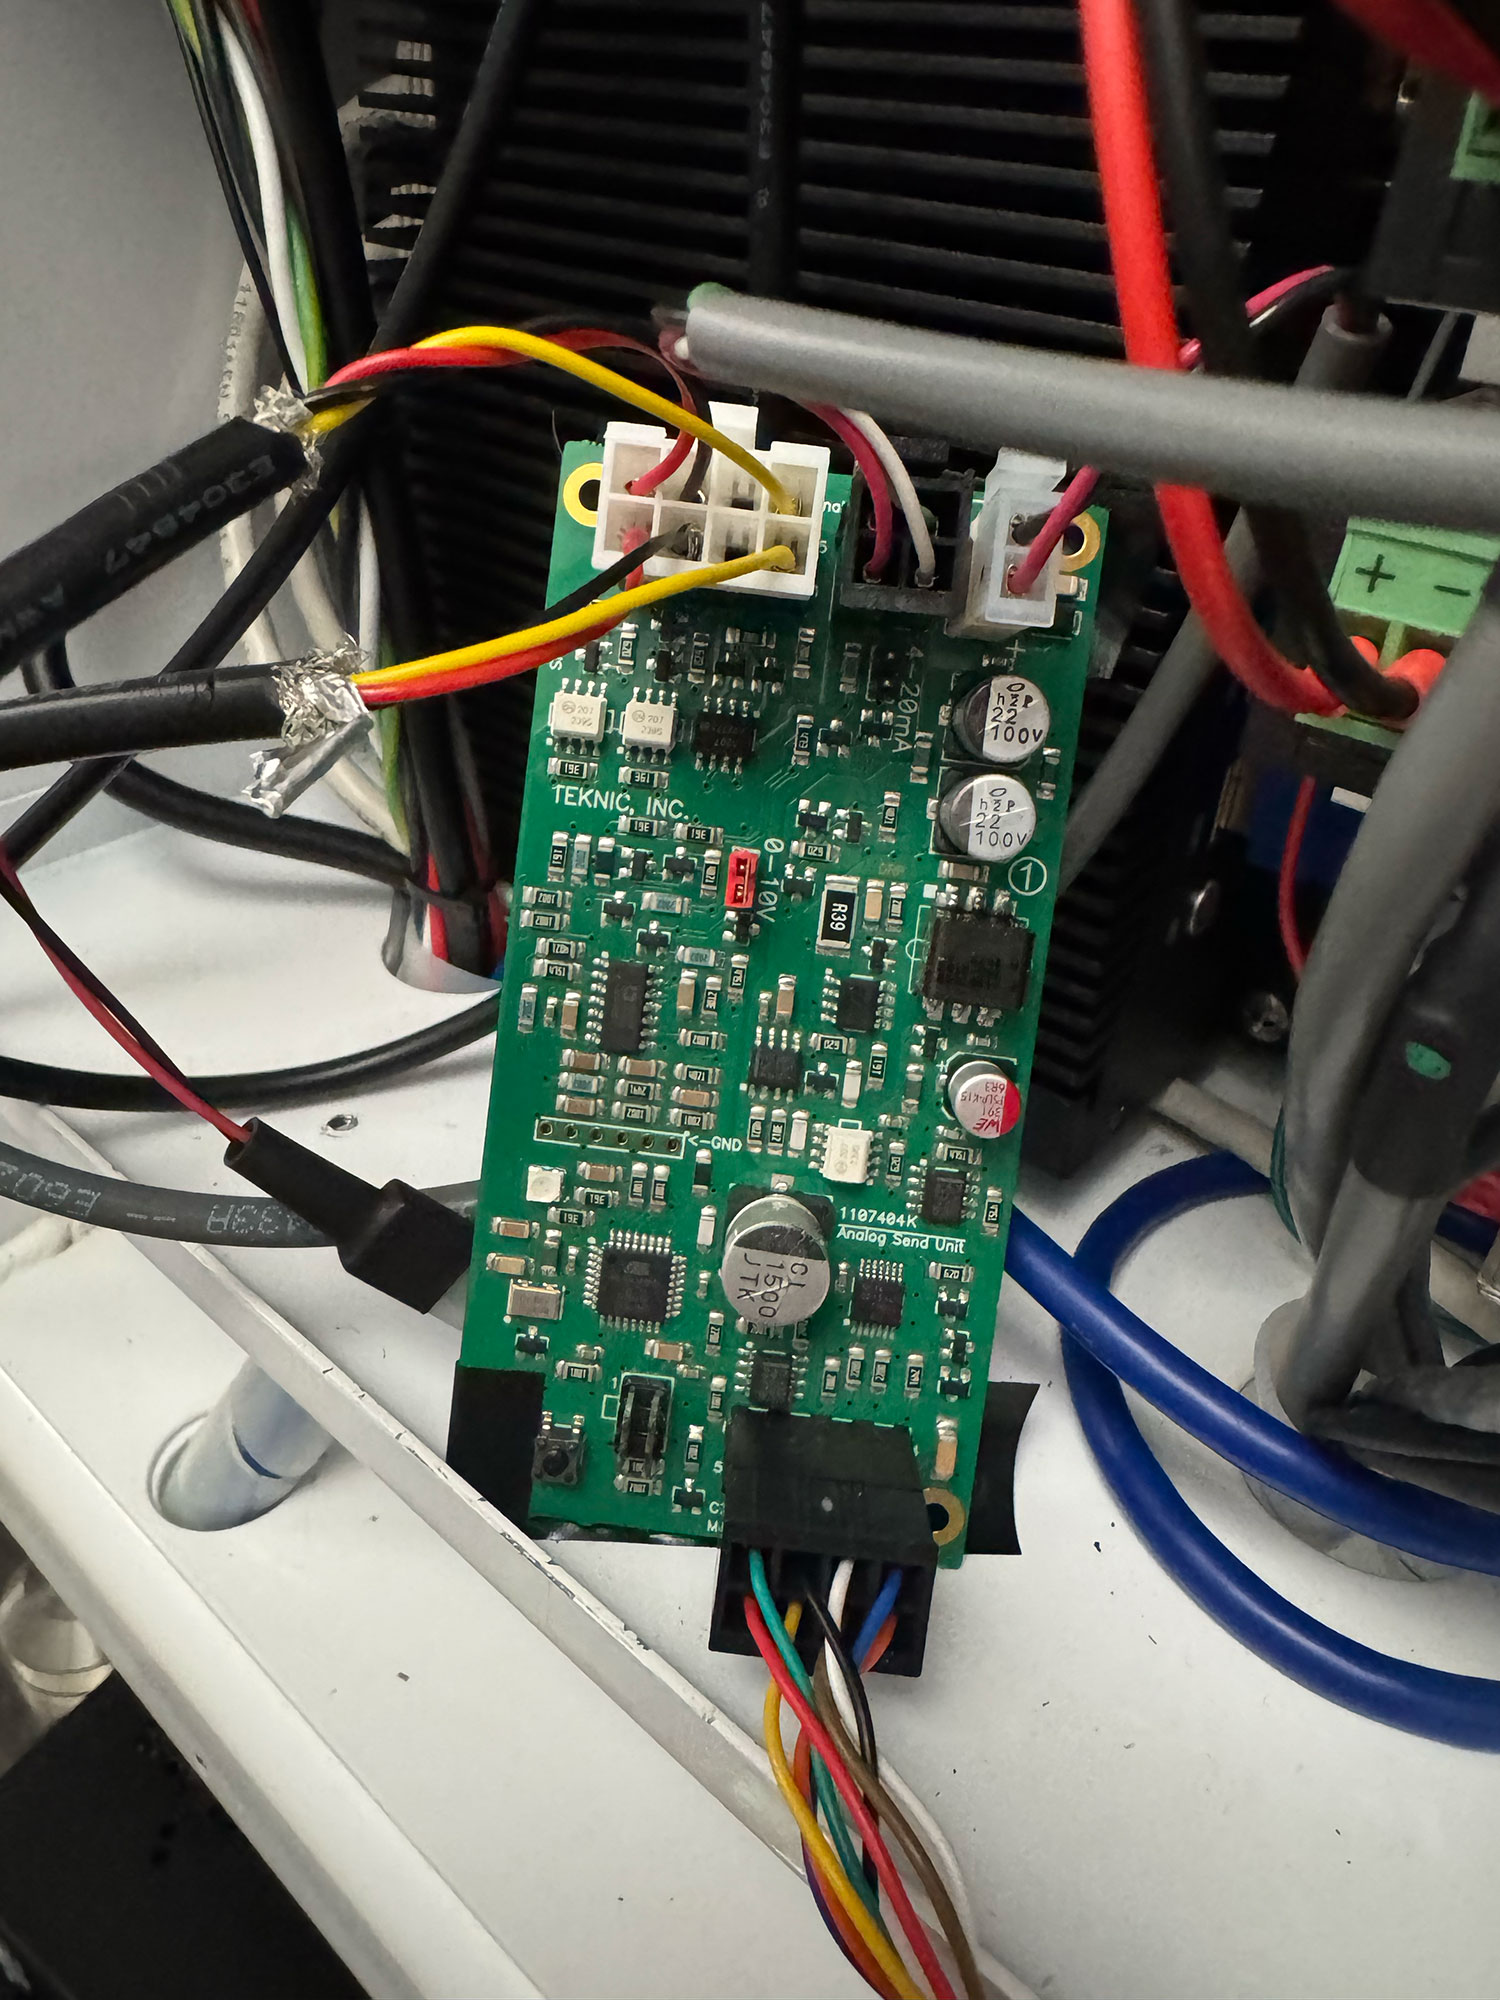
⚙️ Motor: The Real Challenge
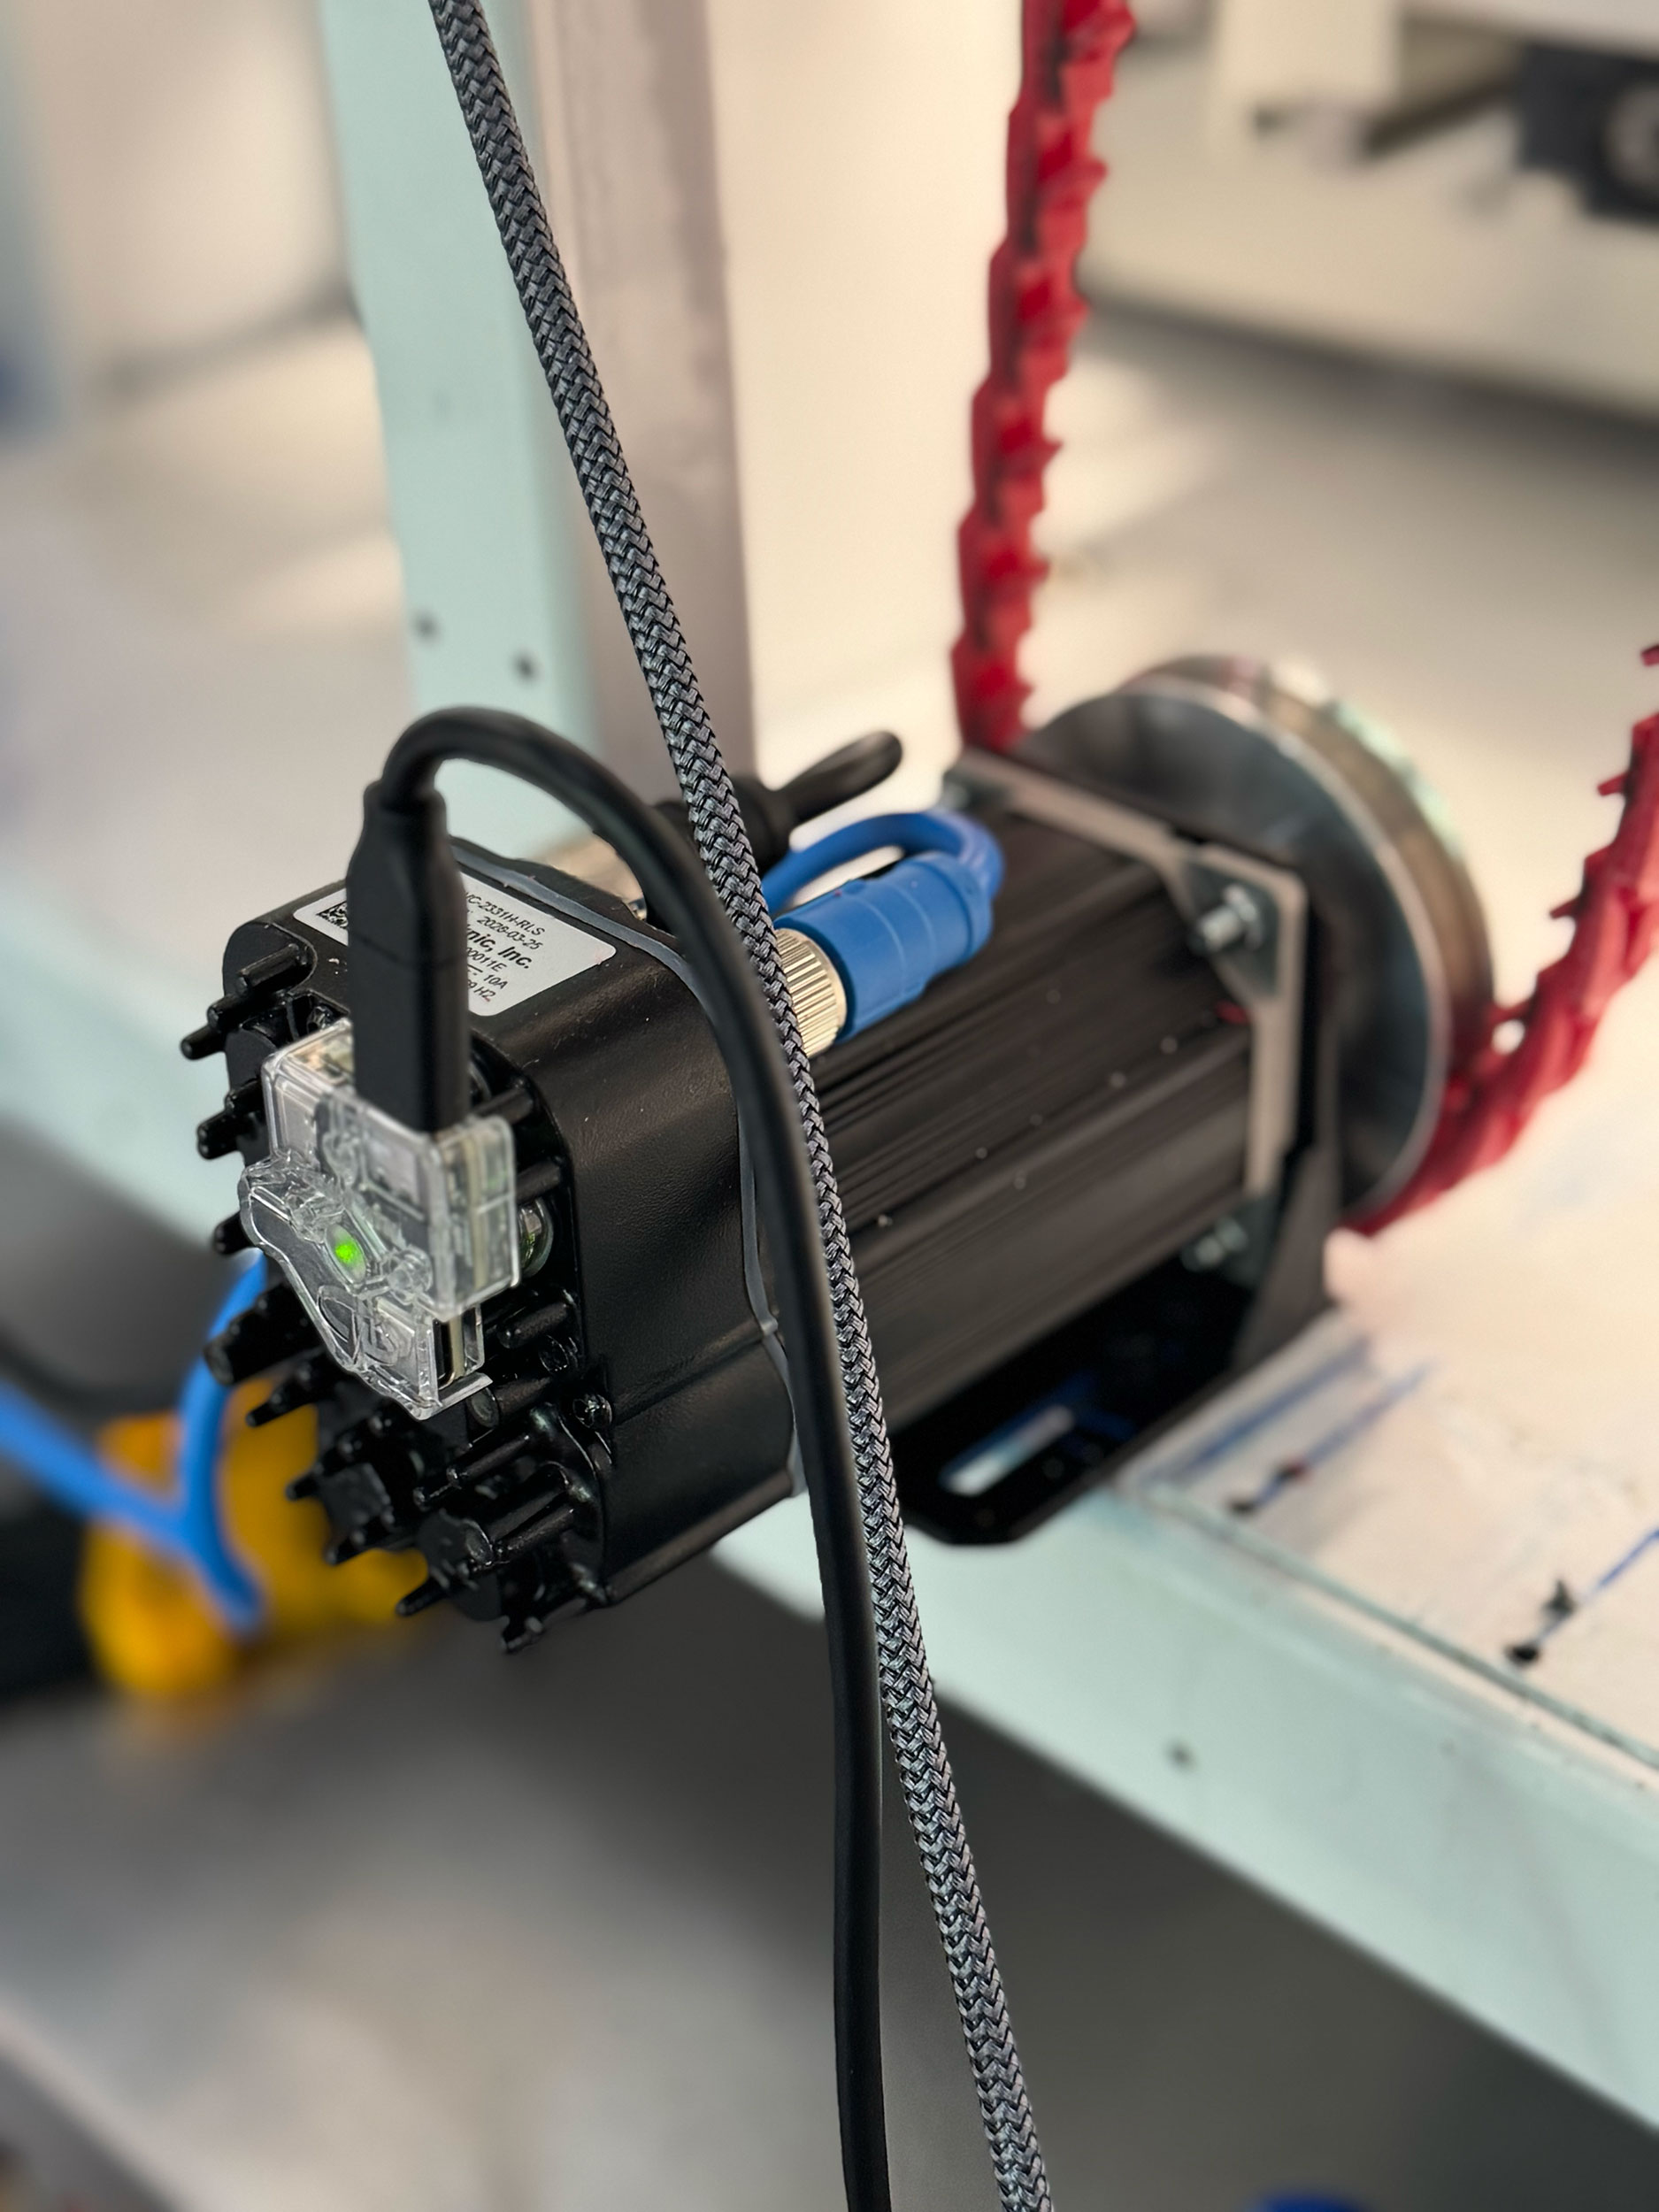
The motor was the trickiest part. I used a Teknic ClearPath Integrated Servo Motor, paired with a power supply, analog send unit, and 22 AWG cables. I’ve never worked with electronics before — so learning to use a multimeter, solder, crimp, and protect everything properly was a major win.
Big thanks to Alexis — couldn’t have done this without his help! 🙏
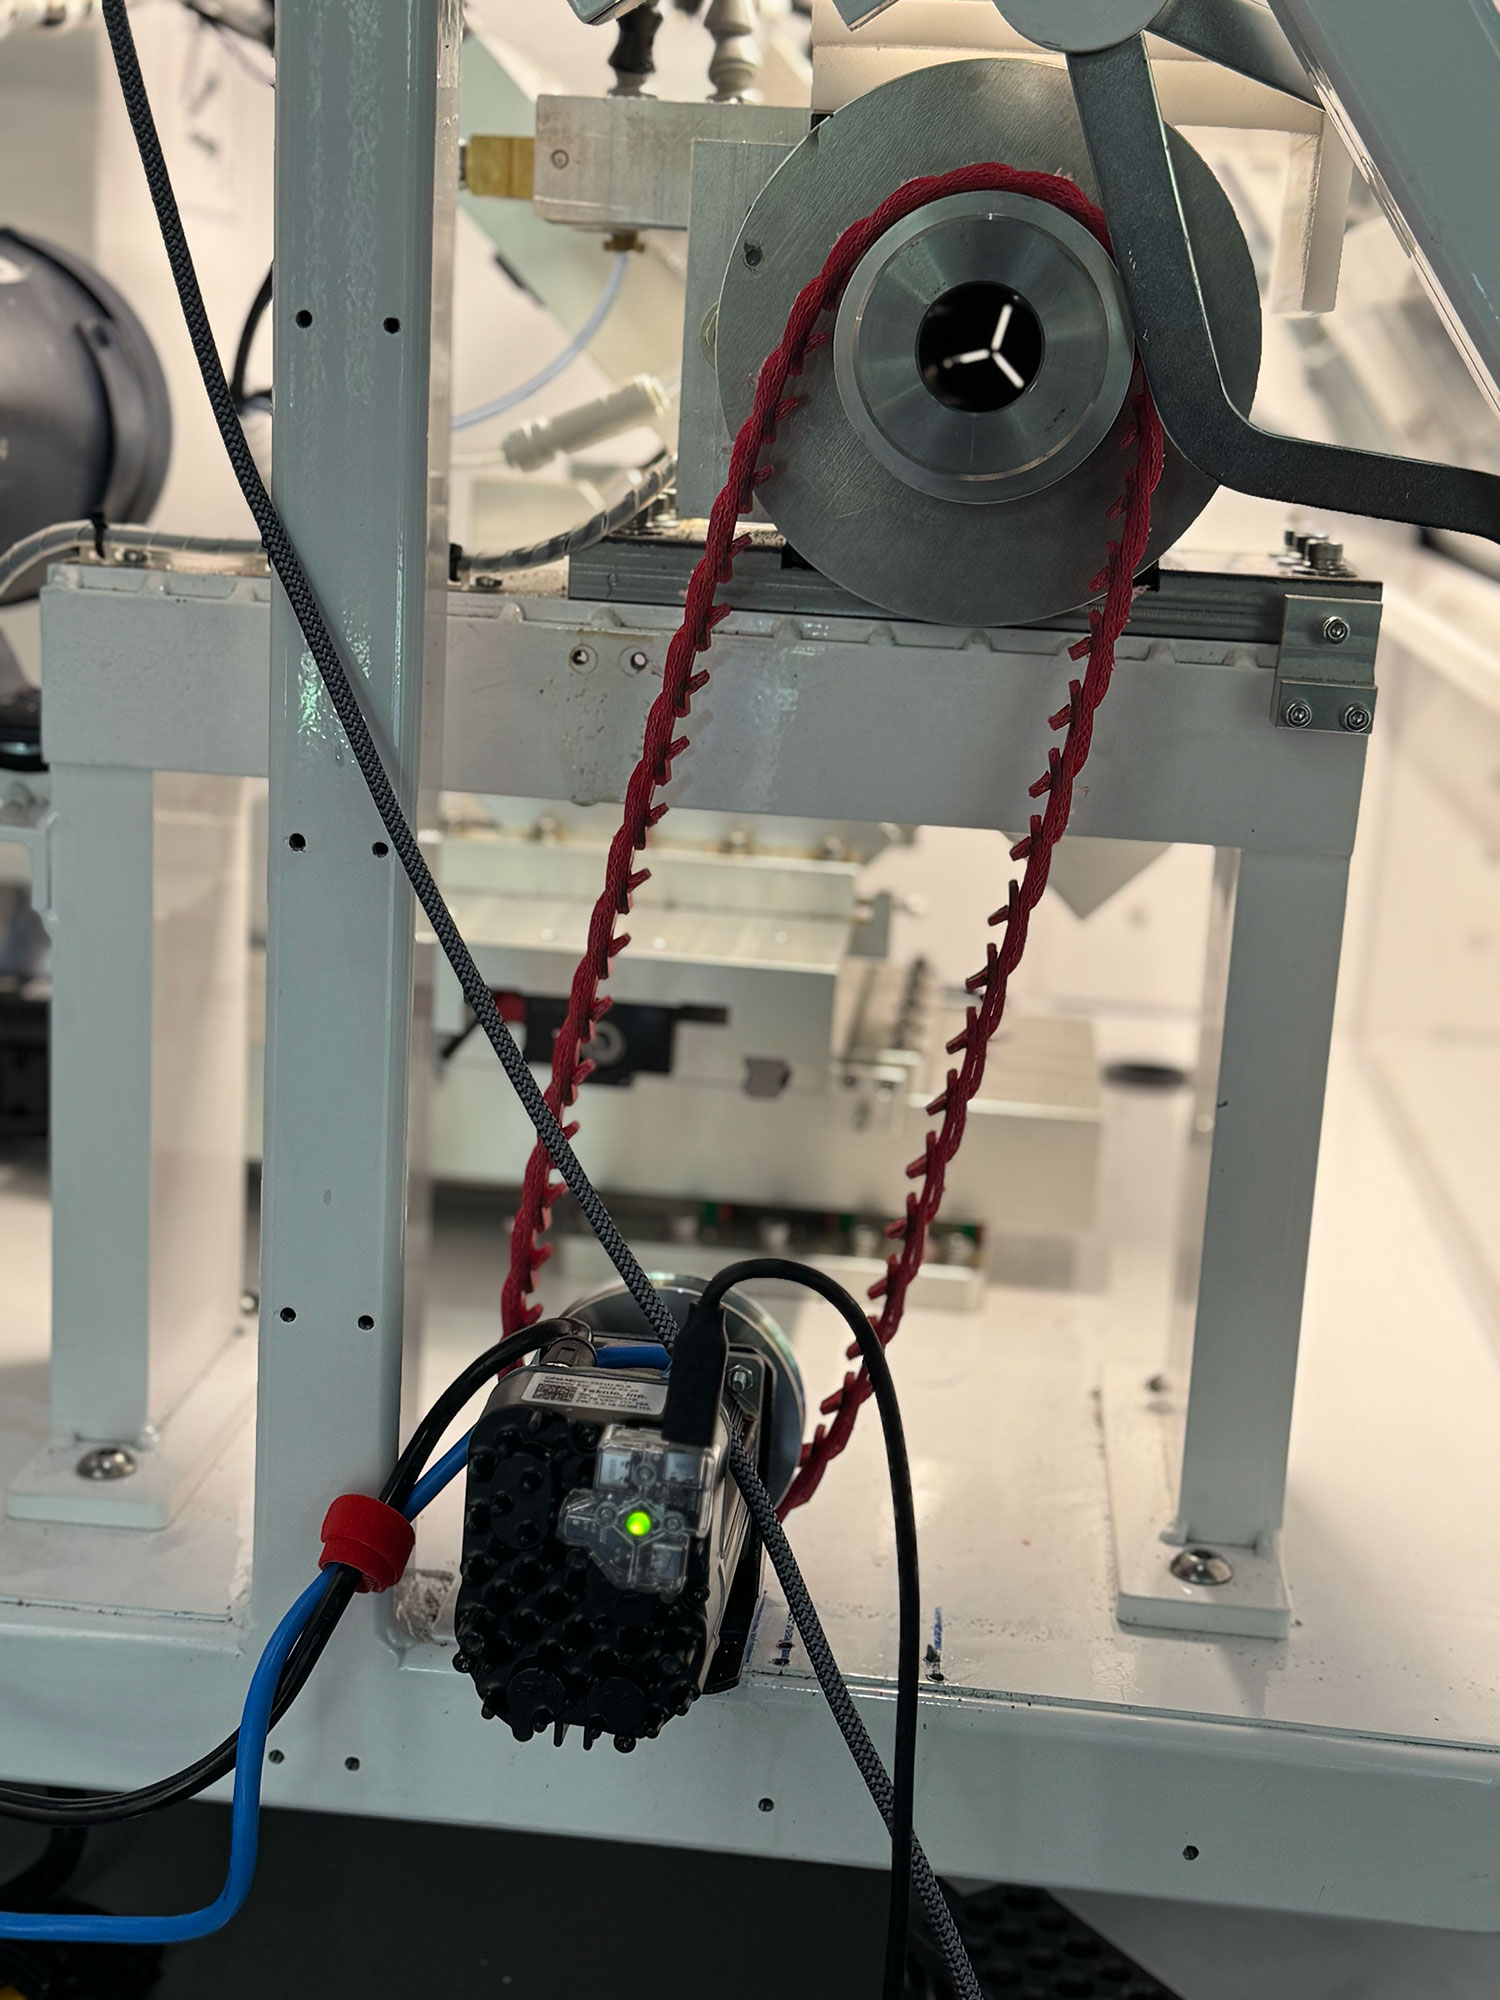
🌀 Spindle & Drive
I went with a Power Twist V-belt. Pulleys are almost 1:1, and even though there’s some drop in RPM (from 2520 to 2320), it feels solid and precise so far.
✅ Past Weeks Recap
- Polished the keyless works, winding mechanism, bridges, and barrel arbor
- Aligned the Elara 4th axis to within 0.01°
- 3D printed the case, revised leg length to avoid scratches
- Built a new brass fixture for 3.0mm stock (no more Loctite hacks!)
- Achieved 2μm precision in XYZ on the Elara mill
- Got replies from Incabloc and updated the balance staff accordingly
- Started grinding my own lathe tools from HSS bar stock
- Published all blog updates via Nostr — auto-summarized with ChatGPT
🔮 What’s Next?
- Finish the balance staff with final jewel specs
- Cut, test, and compare Micro 100 vs HSS tools
- Design and fabricate the elusive crown gears
- Improve pulley ratios and optimize RPM at the spindle
- Figure out how to secure the movement inside the case
- Start polishing and finishing parts for real assembly!
Super excited for what’s coming! Let’s make some beautiful, tiny mechanical art 🌀✨